How to Tighten a Set Screw in a Water Faucet: A Comprehensive Guide
A loose set screw in a water faucet can lead to frustrating issues like wobbly handles or even complete faucet failure. Knowing how to tighten a set screw in a water faucet is a simple yet essential skill for any homeowner. This comprehensive guide will walk you through the process step-by-step, ensuring you can resolve this common plumbing problem quickly and effectively. We’ll cover everything from identifying the set screw to choosing the right tools and executing the repair safely.
Understanding Set Screws in Faucets
Before diving into the repair process, it’s important to understand what a set screw is and its role in a faucet’s functionality. A set screw is a small, headless screw that’s used to secure the faucet handle to the valve stem. When tightened, it creates friction and holds the handle firmly in place. Over time, these screws can loosen due to vibration, wear and tear, or corrosion, leading to a loose or wobbly handle. Learning how to tighten a set screw in a water faucet can prevent further damage and costly repairs.
Identifying the Set Screw Location
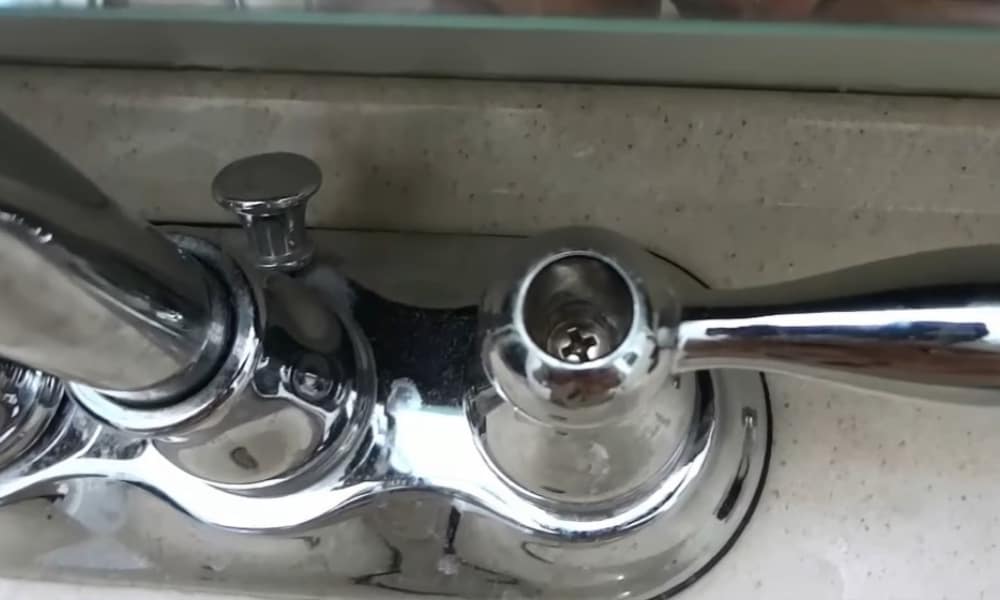
The location of the set screw varies depending on the faucet design. In most cases, it’s hidden beneath a decorative cap or located on the side or underside of the handle. Look for a small hole or indentation. Some faucets might require you to pry off a small cover plate to access the set screw. Carefully inspect the handle and surrounding areas to pinpoint its exact location. If you’re unsure, consult the faucet’s manual or search online for diagrams specific to your faucet model.
Gathering the Necessary Tools and Materials
To successfully tighten a set screw in a water faucet, you’ll need the following tools and materials:
- Allen Wrench (Hex Key): This is the most common tool for tightening set screws. You’ll need a set of Allen wrenches in various sizes to find the one that fits your set screw perfectly.
- Screwdriver (Optional): Some faucets may use a standard or Phillips head set screw.
- Small Screwdriver or Pick: Useful for removing decorative caps or covers.
- Soft Cloth or Towel: To protect the faucet finish from scratches.
- Penetrating Oil (Optional): If the set screw is corroded or stuck.
Step-by-Step Guide to Tightening the Set Screw
Now that you have the tools, let’s proceed with the tightening process. Follow these steps carefully to ensure a secure and effective repair.
Step 1: Turn Off the Water Supply
Before working on any plumbing fixture, it’s crucial to turn off the water supply to prevent flooding and water damage. Locate the shut-off valves for the faucet, usually located under the sink. Turn both the hot and cold water valves clockwise until they are completely closed. If you can’t find individual shut-off valves, you may need to turn off the main water supply to your house.
Step 2: Locate and Access the Set Screw
As mentioned earlier, the set screw is typically hidden beneath a decorative cap or located on the side or underside of the handle. Use a small screwdriver or pick to gently pry off the cap or cover. Be careful not to scratch or damage the faucet finish. Once the cap is removed, you should have clear access to the set screw.
Step 3: Insert the Allen Wrench or Screwdriver
Select the Allen wrench or screwdriver that fits snugly into the set screw. It’s important to use the correct size to avoid stripping the screw head. Insert the wrench or screwdriver into the set screw and ensure it’s fully seated.
Step 4: Tighten the Set Screw
Turn the Allen wrench or screwdriver clockwise to tighten the set screw in the water faucet. Apply gentle but firm pressure. Avoid over-tightening, as this can damage the screw or the faucet handle. The goal is to tighten the screw enough to secure the handle without causing any strain.
Step 5: Test the Handle
After tightening the set screw, test the faucet handle to ensure it’s secure and moves smoothly. If the handle is still loose, try tightening the set screw a little more. If it’s too tight, loosen it slightly until the handle moves freely. The handle should now be firmly attached to the valve stem and operate without wobbling.
Step 6: Replace the Cap or Cover
Once you’re satisfied with the handle’s stability, replace the decorative cap or cover that conceals the set screw. Make sure it’s properly aligned and securely attached.
Step 7: Turn the Water Supply Back On
Slowly turn the water supply valves counterclockwise to restore water flow to the faucet. Check for any leaks around the handle or base of the faucet. If you notice any leaks, turn off the water supply again and inspect the connections. Ensure all fittings are tight and properly sealed.
Troubleshooting Common Issues
Sometimes, you might encounter difficulties while trying to tighten a set screw in a water faucet. Here are some common issues and how to address them:
- Stripped Set Screw: If the set screw head is stripped, it can be difficult to tighten or loosen. Try using a rubber band or steel wool between the wrench and the screw head to improve grip. If that doesn’t work, you may need to replace the set screw.
- Corroded Set Screw: Corrosion can make it difficult to turn the set screw. Apply penetrating oil to the screw and let it sit for a few minutes before attempting to tighten it.
- Missing Set Screw: If the set screw is missing altogether, you’ll need to purchase a replacement. Take the old set screw (if you have it) to a hardware store to find a matching replacement.
Preventative Maintenance Tips
To prevent set screws from loosening in the future, consider these preventative maintenance tips:
- Regularly Check the Handle: Periodically check the faucet handle for looseness. If you notice any wobbling, tighten the set screw before it becomes a major problem.
- Use Threadlocker: Apply a small amount of threadlocker (such as Loctite) to the set screw threads before tightening. This will help keep the screw from loosening due to vibration.
- Avoid Over-Tightening: Over-tightening the set screw can damage the screw or the faucet handle. Tighten it just enough to secure the handle without causing any strain.
When to Call a Professional Plumber
While tightening a set screw in a water faucet is a relatively simple task, there are situations where it’s best to call a professional plumber. If you’re uncomfortable working with plumbing, or if you encounter any of the following issues, seek professional help:
- Extensive Corrosion: If the faucet is heavily corroded, it may be difficult to access or repair the set screw.
- Damaged Faucet: If the faucet is damaged beyond a simple set screw issue, it may need to be replaced.
- Water Leaks: If you’re unable to stop water leaks after tightening the set screw, call a plumber immediately.
Conclusion
Knowing how to tighten a set screw in a water faucet is a valuable skill that can save you time and money. By following the steps outlined in this guide, you can easily resolve this common plumbing problem and keep your faucets functioning properly. Remember to always turn off the water supply before working on any plumbing fixture, and don’t hesitate to call a professional if you encounter any difficulties. Regular maintenance and prompt attention to minor issues can prevent more serious problems down the road. Taking the time to tighten a set screw in a water faucet can extend the life of your faucet and ensure its reliable performance for years to come. [See also: Replacing a Faucet Cartridge] [See also: How to Fix a Leaky Faucet] [See also: Choosing the Right Faucet for Your Kitchen]
