Building a Durable and Stylish Fence with Bunnings Treated Pine
When it comes to enhancing your property’s privacy, security, and aesthetic appeal, a well-constructed fence is an invaluable asset. For many homeowners in Australia, Bunnings treated pine fence solutions offer an affordable, durable, and versatile option. This article delves into the world of Bunnings treated pine fence, exploring its benefits, installation process, maintenance tips, and design considerations. We aim to provide you with a comprehensive guide to help you make informed decisions and create a fence that stands the test of time.
Why Choose Bunnings Treated Pine for Your Fence?
Bunnings treated pine fence is a popular choice for several compelling reasons. Let’s break down the key advantages:
- Durability: Treated pine is specifically engineered to resist rot, decay, and insect infestation. The treatment process involves impregnating the wood with preservatives that significantly extend its lifespan, even in harsh Australian climates.
- Affordability: Compared to other fencing materials like hardwood, metal, or composite, Bunnings treated pine fence is a cost-effective solution. This makes it an attractive option for homeowners on a budget without compromising on quality.
- Versatility: Pine is a highly adaptable material that can be easily cut, shaped, and painted or stained to match your desired aesthetic. This allows for a wide range of design possibilities, from traditional picket fences to modern privacy screens.
- Ease of Installation: Bunnings treated pine fence components are readily available and relatively easy to install, especially for DIY enthusiasts. With basic carpentry skills and the right tools, you can construct a fence yourself, saving on labor costs.
- Sustainability: Pine is a renewable resource, and Bunnings sources its timber from sustainably managed forests. This ensures that your fencing project contributes to responsible forestry practices.
Planning Your Bunnings Treated Pine Fence Project
Before you head to Bunnings, careful planning is crucial for a successful fence installation. Here are some key considerations:
Determine Your Fence’s Purpose
What do you want your fence to achieve? Is it primarily for privacy, security, boundary demarcation, or aesthetic enhancement? Your answer will influence the height, style, and construction of your fence. A privacy fence, for example, will typically be taller and have fewer gaps than a decorative picket fence.
Check Local Regulations
Before commencing any fencing project, it’s essential to check with your local council or authorities for any regulations or permits required. These regulations may specify height restrictions, setback requirements, or approved materials. Failure to comply with these regulations can result in fines or the need to dismantle your fence.
Measure Your Property Boundaries
Accurate measurements are critical for determining the amount of materials you’ll need. Use a measuring tape to precisely measure the length of your property boundaries where the fence will be erected. Factor in the spacing between posts and any gates you plan to include.
Choose Your Fence Style
Bunnings offers a wide variety of treated pine fence styles to suit different tastes and needs. Some popular options include:
- Picket Fence: A classic and charming option, ideal for front yards and decorative purposes.
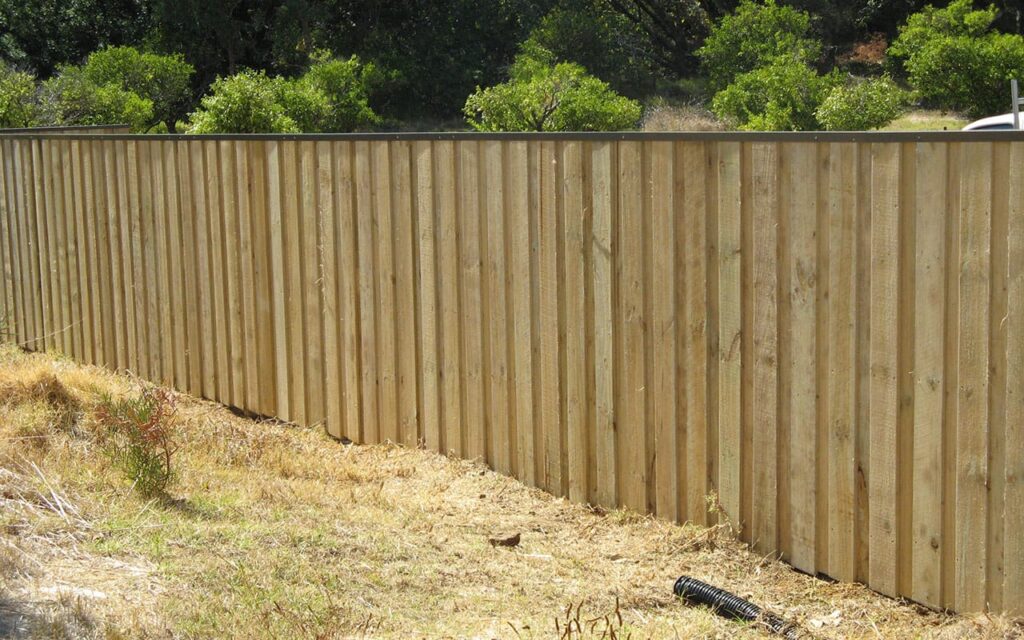
- Privacy Fence: Designed to provide maximum privacy, typically featuring closely spaced vertical boards.
- Post and Rail Fence: A simple and rustic style, often used for rural properties or boundary demarcation.
- Lattice Fence: Adds a decorative touch and allows for some visibility.
- Good Neighbour Fence: Designed to look the same on both sides, making it a popular choice for shared boundaries.
Select Your Materials
Make a comprehensive list of all the materials you’ll need, including:
- Treated Pine Posts: The vertical supports that hold the fence in place.
- Treated Pine Rails: The horizontal supports that connect the posts.
- Treated Pine Palings/Pickets: The vertical boards that form the fence’s surface.
- Concrete Mix: For securing the posts in the ground.
- Fasteners: Screws, nails, or bolts for attaching the components together.
- Gate Hardware: Hinges, latches, and handles for any gates.
- Post Caps: Decorative caps to protect the tops of the posts from the elements.
Installing Your Bunnings Treated Pine Fence: A Step-by-Step Guide
While professional installation is always an option, many homeowners choose to install their Bunnings treated pine fence themselves. Here’s a general guide to the process:
- Mark the Post Locations: Use a string line and pegs to mark the locations of your fence posts, ensuring they are evenly spaced.
- Dig the Post Holes: Dig holes that are deep and wide enough to accommodate the posts and concrete. The depth of the holes will depend on the height of the fence and the soil conditions.
- Set the Posts: Place the posts in the holes and use a level to ensure they are plumb. Pour concrete mix into the holes around the posts, ensuring it is properly compacted. Allow the concrete to cure completely before proceeding.
- Attach the Rails: Once the concrete has cured, attach the rails to the posts using screws or nails. Ensure the rails are level and evenly spaced.
- Attach the Palings/Pickets: Attach the palings or pickets to the rails, ensuring they are evenly spaced and aligned. Use screws or nails to secure them in place.
- Install the Gate: If you are including a gate, install the gate posts and attach the gate using hinges. Install the latch and handle to complete the gate installation.
- Add Finishing Touches: Add post caps to protect the tops of the posts. You can also paint or stain the fence to enhance its appearance and protect it from the elements.
Maintaining Your Bunnings Treated Pine Fence
Proper maintenance is essential for prolonging the lifespan of your Bunnings treated pine fence. Here are some key maintenance tips:
- Regular Cleaning: Wash your fence regularly with a mild detergent and water to remove dirt, grime, and mildew.
- Inspect for Damage: Regularly inspect your fence for any signs of damage, such as rot, cracks, or insect infestation. Address any issues promptly to prevent further damage.
- Re-staining or Painting: Re-stain or paint your fence every few years to protect it from the elements and maintain its appearance. Use a high-quality exterior paint or stain specifically designed for treated pine.
- Weed Control: Keep weeds and vegetation away from the base of the fence to prevent moisture buildup and potential damage.
Design Ideas for Your Bunnings Treated Pine Fence
Bunnings treated pine fence offers endless design possibilities. Here are some ideas to inspire you:
- Add Decorative Elements: Incorporate decorative elements such as lattice panels, post caps, or ornamental plants to enhance the fence’s aesthetic appeal.
- Create a Garden Feature: Use your fence as a backdrop for a garden bed or climbing plants.
- Incorporate Lighting: Install outdoor lighting along the fence to create a warm and inviting ambiance.
- Paint or Stain Strategically: Use different colors or stains to create visual interest and complement your home’s exterior.
- Mix and Match Materials: Combine Bunnings treated pine fence with other materials like metal or stone to create a unique and contemporary look.
Cost Considerations for a Bunnings Treated Pine Fence
The cost of a Bunnings treated pine fence will vary depending on several factors, including the size of the fence, the style, the materials used, and whether you hire a professional installer. Here’s a general breakdown of the costs involved:
- Materials: The cost of treated pine posts, rails, palings, concrete, and fasteners will be the most significant expense.
- Labor: If you hire a professional installer, labor costs can range from $50 to $100 per hour.
- Permits: Permit fees may apply depending on your local council regulations.
- Tools: If you don’t already own the necessary tools, you may need to purchase or rent them.
To get an accurate estimate of the cost of your Bunnings treated pine fence project, it’s best to obtain quotes from multiple suppliers and installers.
Conclusion
A Bunnings treated pine fence is a versatile, durable, and affordable solution for enhancing your property’s privacy, security, and aesthetic appeal. By carefully planning your project, selecting the right materials, and following the proper installation techniques, you can create a fence that will stand the test of time. Remember to maintain your fence regularly to prolong its lifespan and keep it looking its best. With a little effort and creativity, you can transform your outdoor space with a beautiful and functional Bunnings treated pine fence.
[See also: Fencing Materials Comparison]
[See also: DIY Fence Installation Guide]
[See also: Choosing the Right Fence Style]
