Decoding the Better Homes and Gardens 8-Cube Organizer: A Comprehensive Assembly Guide
The Better Homes and Gardens 8-cube organizer is a popular choice for those seeking versatile and stylish storage solutions. Its modular design allows for customization, making it suitable for various spaces and needs. However, assembling this organizer can sometimes feel like navigating a maze without proper Better Homes and Gardens 8 cube organizer instructions. This article aims to provide a clear, concise, and comprehensive guide to ensure a smooth and successful assembly process. We’ll delve into each step, offering tips and tricks to avoid common pitfalls, so you can quickly enjoy your new storage unit. Whether you’re a seasoned DIY enthusiast or a first-time assembler, this guide will help you master the Better Homes and Gardens 8-cube organizer.
Understanding the Components
Before diving into the assembly process, it’s crucial to familiarize yourself with all the components included in the Better Homes and Gardens 8-cube organizer package. Typically, you’ll find:
- Side panels (the tallest panels)
- Horizontal shelves (the wider shelves)
- Vertical dividers (the narrower shelves)
- Backing boards (usually thin cardboard or fiberboard)
- Hardware (screws, dowels, and sometimes cam locks)
- Instruction manual (though often lacking detail)
Take inventory and ensure that all parts are present. Compare the parts list in the included manual with the actual components. This proactive step can save you time and frustration later on. If any parts are missing or damaged, contact the retailer or manufacturer for replacements before proceeding.
Essential Tools for Assembly
Having the right tools on hand will significantly streamline the assembly process. Here’s a list of essential tools you’ll need to put together your Better Homes and Gardens 8-cube organizer:
- Screwdriver (Phillips head) – A manual screwdriver is often sufficient, but a power drill with a Phillips head attachment can speed things up. Be careful not to overtighten screws with a power drill.
- Hammer – For gently tapping in dowels or securing the backing boards.
- Level – To ensure the organizer is perfectly level and stable.
- Measuring tape – Useful for precise alignment and placement.
- Soft cloth or blanket – To protect the surfaces of the panels from scratches during assembly.
Optional but helpful tools include a rubber mallet, a stud finder (if mounting to a wall), and wood glue (for added stability, although not usually required).
Step-by-Step Assembly Instructions
Now, let’s get to the heart of the matter: the step-by-step assembly of your Better Homes and Gardens 8-cube organizer. Follow these instructions carefully, referring to the diagrams in the included manual as needed.
Step 1: Preparing the Side Panels
Begin by laying out the side panels on a protected surface. Identify the pre-drilled holes for the shelves and dividers. Insert dowels into the appropriate holes, gently tapping them in with a hammer until they are flush with the surface. These dowels will provide additional support and alignment for the shelves and dividers.
Step 2: Attaching the Bottom Shelf
Take one of the horizontal shelves and align it with the bottom set of dowels on both side panels. Carefully press the shelf onto the dowels, ensuring it sits flush against the side panels. Secure the shelf with screws, using the pre-drilled holes as guides. Tighten the screws firmly, but avoid overtightening, which could damage the particleboard.
Step 3: Installing the Vertical Dividers
Next, install the vertical dividers. These dividers create the individual cube compartments. Align the dividers with the corresponding dowels and pre-drilled holes on the side panels and the bottom shelf. Press the dividers into place and secure them with screws. Make sure the dividers are perfectly vertical before tightening the screws to ensure a square and stable structure.
Step 4: Adding the Remaining Shelves
Repeat the process for the remaining horizontal shelves, working your way up the organizer. Align each shelf with the dowels and pre-drilled holes, press it into place, and secure it with screws. Ensure that each shelf is level and flush with the side panels and dividers.
Step 5: Attaching the Top Shelf
Once all the other shelves and dividers are in place, attach the top shelf. This shelf is typically identical to the bottom shelf. Align it with the top set of dowels on the side panels, press it into place, and secure it with screws. Double-check that all screws are tightened properly and that the entire structure is stable.
Step 6: Securing the Backing Boards
The backing boards provide additional stability and prevent items from falling out the back of the cubes. Lay the organizer face down on a protected surface. Align the backing boards with the back edges of the organizer. Secure the backing boards with small nails or tacks, spacing them evenly along the edges. Be careful not to hammer the nails too deeply, as this could damage the backing boards or the organizer itself. Some Better Homes and Gardens 8 cube organizer instructions suggest using a staple gun for this step, which can be faster and more efficient.
Step 7: Final Inspection and Leveling
Carefully turn the organizer upright. Inspect the entire structure to ensure that all screws are tightened and that all panels are properly aligned. Use a level to check if the organizer is perfectly level. If it’s not, you can adjust the level by placing shims under the bottom corners until it’s stable and even. This is especially important if you plan to place the organizer on an uneven floor.
Troubleshooting Common Assembly Issues
Even with detailed Better Homes and Gardens 8 cube organizer instructions, you might encounter some common issues during assembly. Here are some troubleshooting tips:
- Screws stripping: If the screws are stripping, try using a slightly larger screwdriver or applying more pressure while turning the screw. Avoid overtightening.
- Panels not aligning: Double-check that the dowels are properly inserted and that the panels are aligned correctly before tightening the screws. Loosen the screws and readjust if necessary.
- Organizer wobbling: Ensure that the organizer is placed on a level surface. Use shims to level it if needed. Also, double-check that all screws are tightened properly.
- Missing parts: Contact the retailer or manufacturer for replacement parts. Do not attempt to assemble the organizer without all the necessary components.
Customization and Styling Tips
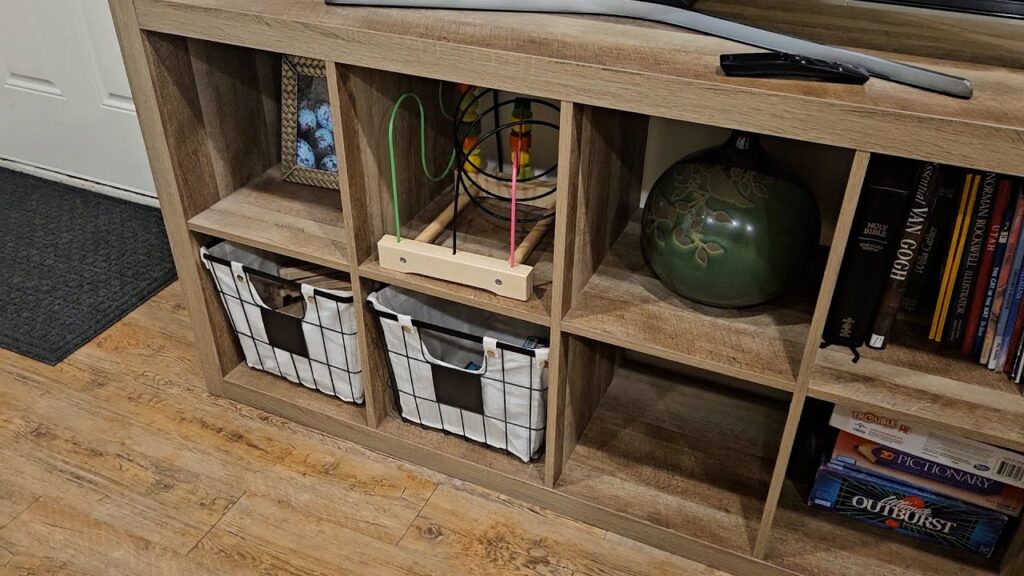
Once your Better Homes and Gardens 8-cube organizer is assembled, the fun begins! Here are some customization and styling tips to make the most of your new storage unit:
- Fabric Bins: Add fabric bins to conceal clutter and create a more organized look. Choose bins in coordinating colors or patterns to match your decor.
- Decorative Accents: Display decorative items such as plants, picture frames, and sculptures to add personality and visual interest.
- Books and Media: Use the cubes to store books, DVDs, and other media. Organize them by genre or color for a visually appealing display.
- Lighting: Incorporate lighting elements such as LED strip lights or small lamps to highlight specific cubes and create a warm and inviting ambiance.
- Wall Mounting: For added safety and stability, especially if you have young children, consider mounting the organizer to the wall using appropriate hardware. [See also: Securing Furniture to Prevent Tip-Overs]
Maintaining Your 8-Cube Organizer
To keep your Better Homes and Gardens 8-cube organizer looking its best, follow these maintenance tips:
- Dust Regularly: Wipe down the surfaces with a soft, dry cloth to remove dust and dirt.
- Clean Spills Immediately: Clean up any spills immediately with a damp cloth to prevent staining or damage.
- Avoid Harsh Cleaners: Avoid using harsh chemicals or abrasive cleaners, as these can damage the finish.
- Check Screws Periodically: Periodically check the screws to ensure they are tightened properly. Tighten any loose screws to maintain the stability of the organizer.
Conclusion
Assembling the Better Homes and Gardens 8-cube organizer doesn’t have to be a daunting task. By following these comprehensive Better Homes and Gardens 8 cube organizer instructions, understanding the components, using the right tools, and taking your time, you can successfully assemble your new storage unit and enjoy its versatility and style for years to come. Remember to prioritize safety, double-check your work, and customize the organizer to suit your specific needs and preferences. With a little patience and attention to detail, you’ll have a functional and attractive storage solution that enhances your home decor. The Better Homes and Gardens 8-cube organizer is a great addition to any home and offers a lot of flexibility and storage options. Happy assembling!
