DIY Front Porch Stair Railings: A Comprehensive Guide to Building Your Own
Enhancing your home’s curb appeal and ensuring safety doesn’t always require a professional contractor. Building your own DIY front porch stair railings can be a rewarding project, adding a personal touch while potentially saving money. This comprehensive guide will walk you through the process, from planning and design to material selection and installation, empowering you to create sturdy and stylish railings for your front porch stairs. We’ll cover everything you need to know to confidently tackle this project.
Why Choose DIY Front Porch Stair Railings?
There are several compelling reasons to consider a do-it-yourself approach to your front porch stair railings:
- Cost Savings: Professional installation can be expensive. DIY projects allow you to control costs by sourcing materials and providing the labor yourself.
- Customization: You have complete control over the design, materials, and finish, ensuring the railings perfectly complement your home’s aesthetic.
- Personal Satisfaction: There’s a unique sense of accomplishment that comes from building something yourself.
- Increased Home Value: Well-built and aesthetically pleasing railings can enhance your home’s curb appeal, potentially increasing its value.
Planning and Design: The Foundation of Your Project
Before you even think about picking up a hammer, thorough planning is crucial. This stage involves assessing your existing porch, determining your railing needs, and creating a detailed design.
Measuring Your Stairs
Accurate measurements are essential for a successful railing installation. Measure the following:
- Total Rise: The vertical distance from the bottom of the stairs to the top landing.
- Total Run: The horizontal distance covered by the stairs.
- Individual Riser Height: The height of each step.
- Individual Tread Depth: The depth of each step.
- Railing Length: The distance along the stairs where the railing will be installed.
Code Compliance and Safety
Building codes exist for a reason: to ensure safety. Research local building codes regarding railing height, spacing between balusters, and structural requirements. Common requirements include:
- Railing Height: Typically 36-42 inches from the stair tread to the top of the railing.
- Baluster Spacing: Generally, no more than 4 inches between balusters to prevent children from squeezing through.
- Load Requirements: Railings must be able to withstand a certain amount of force.
Ignoring building codes can result in fines and the need to redo your work. Always prioritize safety and compliance.
Design Considerations
The design of your DIY front porch stair railings should complement your home’s style. Consider the following:
- Material: Wood, metal, composite, and vinyl are common choices. Each has its own aesthetic and maintenance requirements.
- Style: Choose a style that matches your home’s architecture. Options include traditional, modern, rustic, and contemporary.
- Baluster Design: Balusters can be simple or ornate, adding visual interest to the railings.
- Color and Finish: Select colors and finishes that coordinate with your home’s exterior.
Sketching your design or using online design tools can help you visualize the finished product.
Material Selection: Choosing the Right Components
The materials you choose will significantly impact the look, durability, and maintenance of your DIY front porch stair railings. Here’s a breakdown of common options:
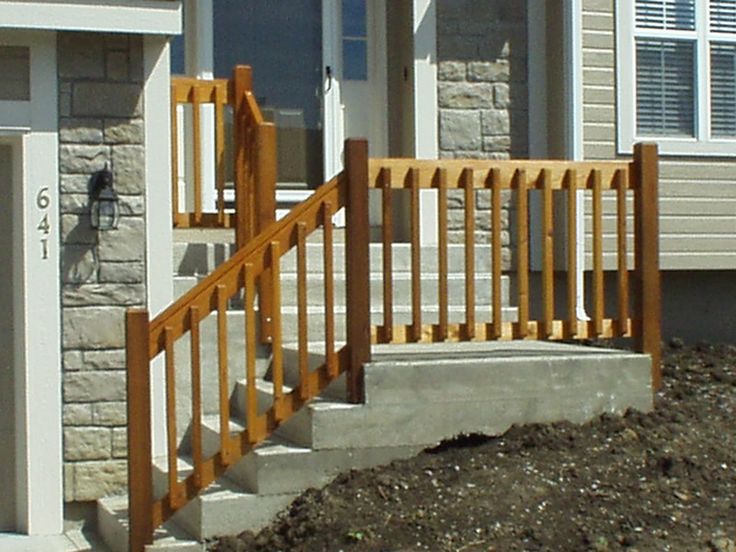
Wood
Wood is a classic choice, offering warmth and versatility. Popular wood options include:
- Pressure-Treated Lumber: Resistant to rot and insects, making it ideal for outdoor use.
- Cedar: Naturally resistant to decay and insects, with a beautiful grain.
- Redwood: Similar to cedar, with a rich color and natural resistance.
Wood requires regular maintenance, including painting or staining, to protect it from the elements.
Metal
Metal railings offer strength and durability, with a modern aesthetic. Common metal options include:
- Aluminum: Lightweight, rust-resistant, and available in various finishes.
- Steel: Strong and durable, but susceptible to rust if not properly coated.
- Wrought Iron: A classic choice with intricate designs, but requires regular maintenance to prevent rust.
Metal railings can be more expensive than wood, but they often require less maintenance.
Composite
Composite railings are made from a blend of wood fibers and plastic, offering the look of wood with increased durability and low maintenance. They are resistant to rot, insects, and fading.
Vinyl
Vinyl railings are a low-maintenance option that is resistant to rot, insects, and fading. They are available in various colors and styles, but they may not offer the same aesthetic appeal as wood or metal.
Tools and Equipment: Getting Prepared
Having the right tools and equipment will make your DIY front porch stair railings project much easier and safer. Essential tools include:
- Measuring Tape: For accurate measurements.
- Level: To ensure railings are plumb and level.
- Miter Saw: For cutting lumber at precise angles.
- Drill/Driver: For drilling pilot holes and driving screws.
- Circular Saw: For cutting lumber to length.
- Safety Glasses: To protect your eyes from debris.
- Gloves: To protect your hands.
- Pencil: For marking measurements.
- Clamps: To hold materials in place while working.
- Post Hole Digger (if needed): For setting posts in the ground.
Consider renting specialized tools if you don’t own them.
Step-by-Step Installation Guide
Now for the fun part: building your DIY front porch stair railings. Follow these steps for a successful installation:
Step 1: Setting the Posts
The posts are the foundation of your railings. If your stairs already have posts, ensure they are structurally sound. If not, you’ll need to set new posts. Dig holes for the posts, ensuring they are deep enough to provide stability. Set the posts in concrete, ensuring they are plumb and level. Allow the concrete to cure completely before proceeding.
Step 2: Installing the Top and Bottom Rails
Cut the top and bottom rails to the desired length. Attach them to the posts using screws or brackets. Ensure the rails are level and securely fastened.
Step 3: Installing the Balusters
Measure and cut the balusters to the appropriate length. Space the balusters evenly between the top and bottom rails, ensuring they comply with building codes. Attach the balusters using screws or nails. Consider using a jig to ensure consistent spacing.
Step 4: Finishing Touches
Once the railings are installed, inspect them for any loose connections or imperfections. Fill any nail holes or gaps with wood filler. Sand the railings smooth and apply a finish of your choice, such as paint, stain, or sealant. [See also: Painting Outdoor Wood Railings] This will protect the wood from the elements and enhance its appearance.
Safety Precautions
Safety should always be your top priority when working on any DIY project. Follow these safety precautions:
- Wear safety glasses and gloves at all times.
- Use power tools safely and follow manufacturer’s instructions.
- Work in a well-ventilated area.
- Be aware of your surroundings and avoid distractions.
- If you’re unsure about any step, consult a professional.
Maintenance and Care
Proper maintenance will extend the life of your DIY front porch stair railings. Regularly inspect the railings for any signs of damage or wear. Tighten any loose screws or connections. Clean the railings regularly to remove dirt and debris. Apply a fresh coat of paint, stain, or sealant as needed to protect the wood from the elements. [See also: Maintaining Wood Porch Railings] Repair any damage promptly to prevent further deterioration. A little preventative maintenance can save you time and money in the long run.
Troubleshooting Common Problems
Even with careful planning, you may encounter some challenges during your DIY front porch stair railings project. Here are some common problems and how to address them:
- Wobbly Railings: Ensure the posts are securely set in concrete and the rails are properly attached.
- Uneven Baluster Spacing: Use a jig to ensure consistent spacing between balusters.
- Railing Height Not to Code: Double-check your measurements and adjust the railing height as needed.
Don’t be afraid to ask for help from a friend or consult a professional if you’re struggling with a particular problem.
Conclusion
Building your own DIY front porch stair railings can be a rewarding and cost-effective project. By following this comprehensive guide, you can create sturdy and stylish railings that enhance your home’s curb appeal and ensure safety. Remember to plan carefully, choose the right materials, and prioritize safety throughout the process. With a little effort and attention to detail, you can create railings that you’ll be proud of for years to come.
